Example Use Cases

Sync Google Groups to Slack usergroups

Connect Google Groups and Slack, create a team, then manage, report on and delete it.

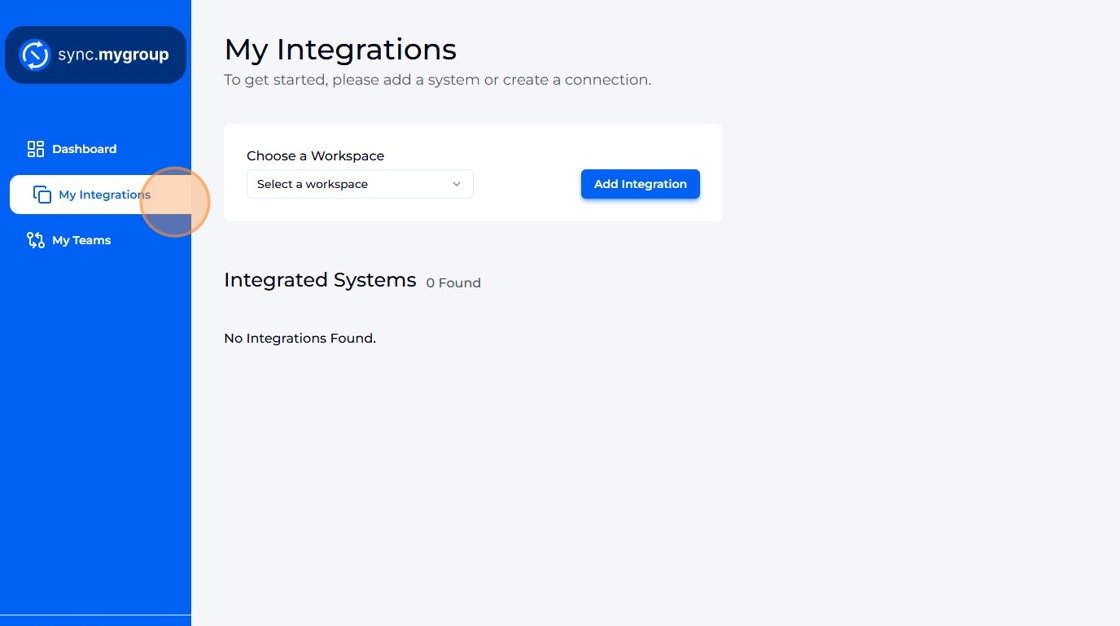
  1. Navigate to "My Integrations".

    Navigate to My Integrations.

  2. Select "Google Group" as a workspace and click "Add Integration".
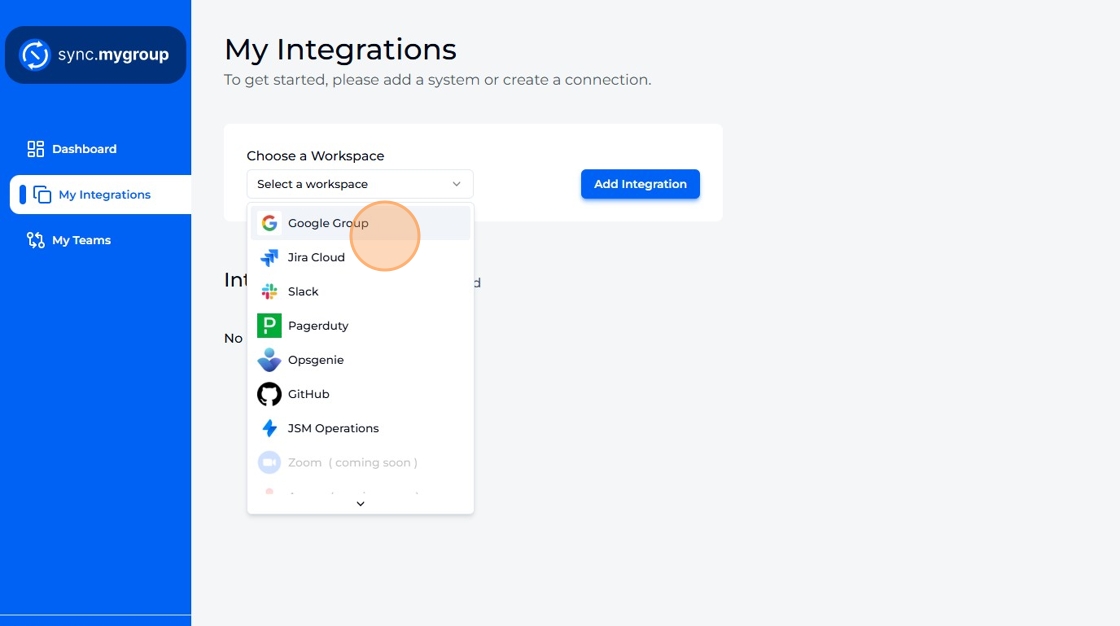
    Select Google Group as a workspace and click Add Integration.

  3. Select config type and click "Connect" and follow the steps.
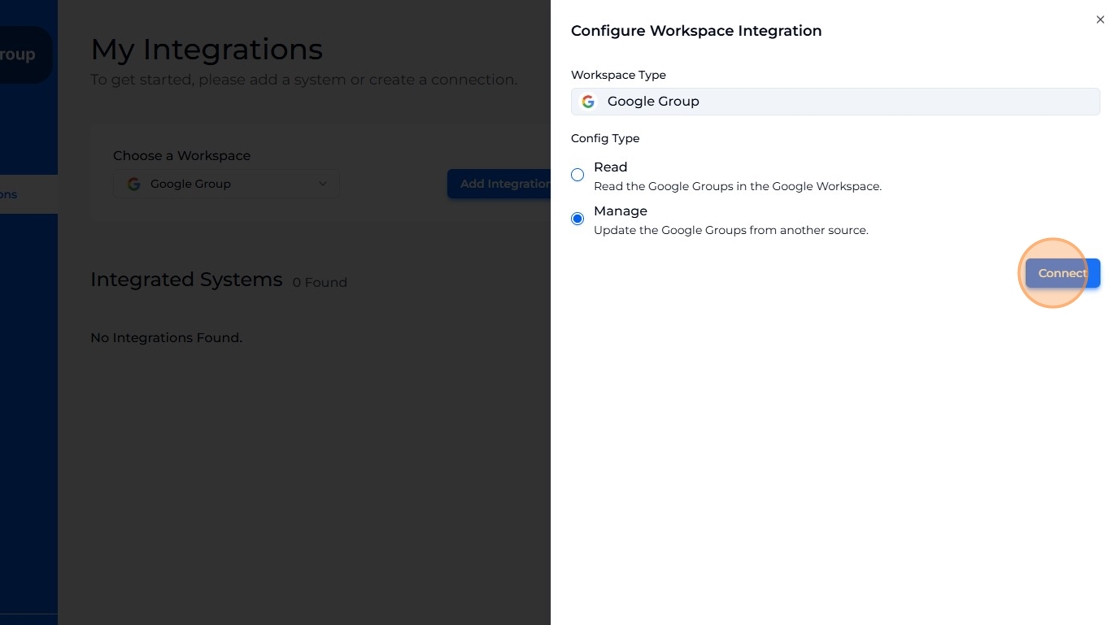
    Select config type and click Connect and follow the steps.

  4. "Google Group" should be integrated successfully!
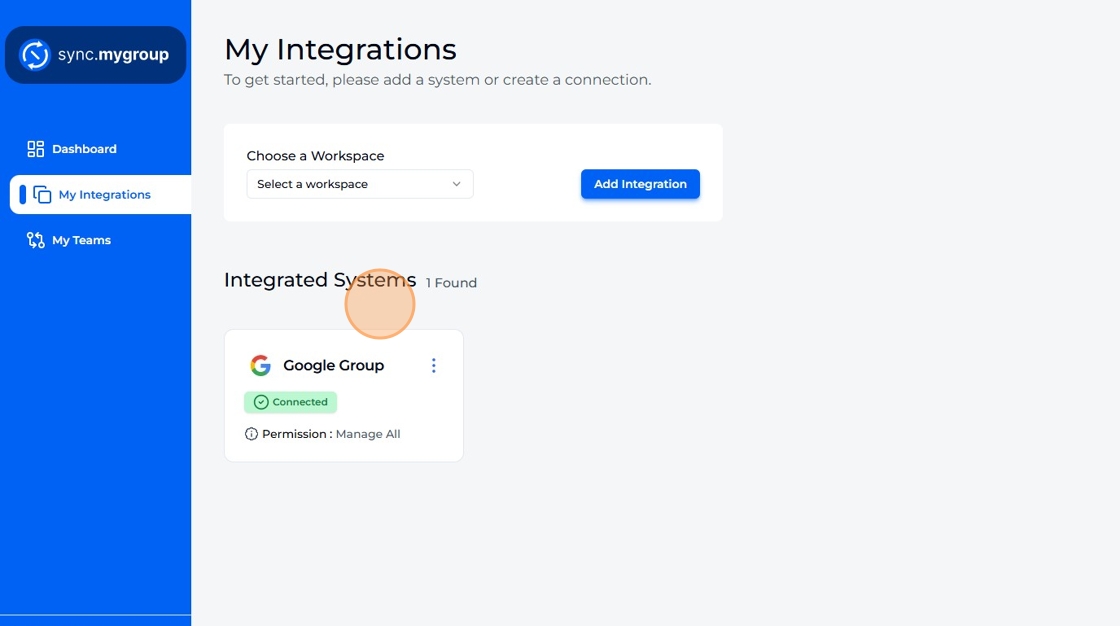
    Google Group should be integrated successfully!

  5. Select "Slack" as a workspace and click "Add Integration".
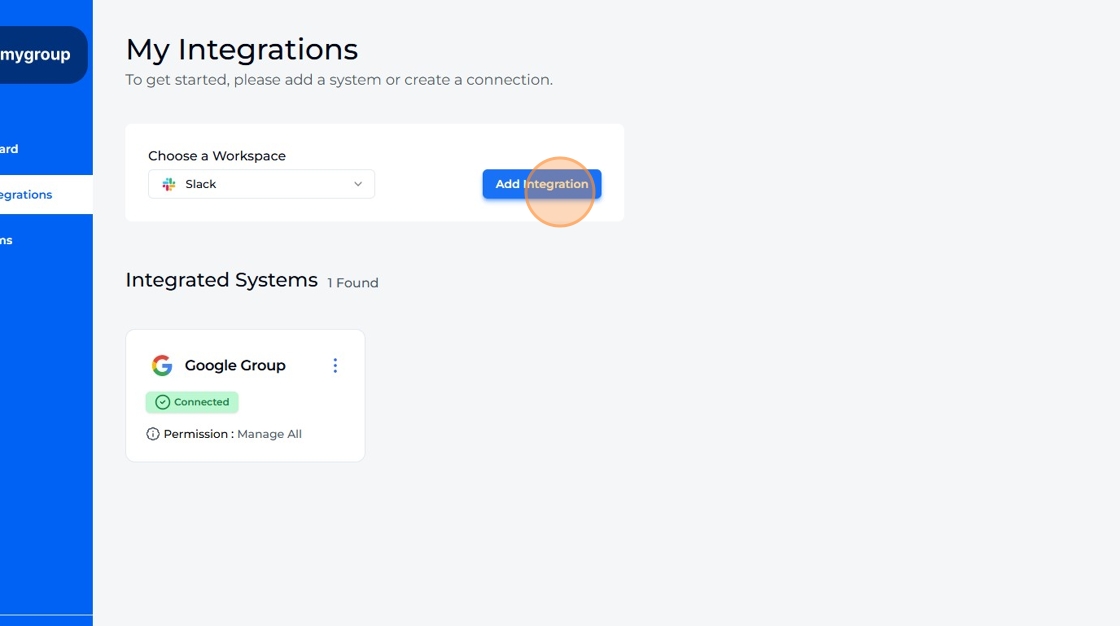
    Select Slack as a workspace and click Add Integration.

  6. Select config type and click "Connect".
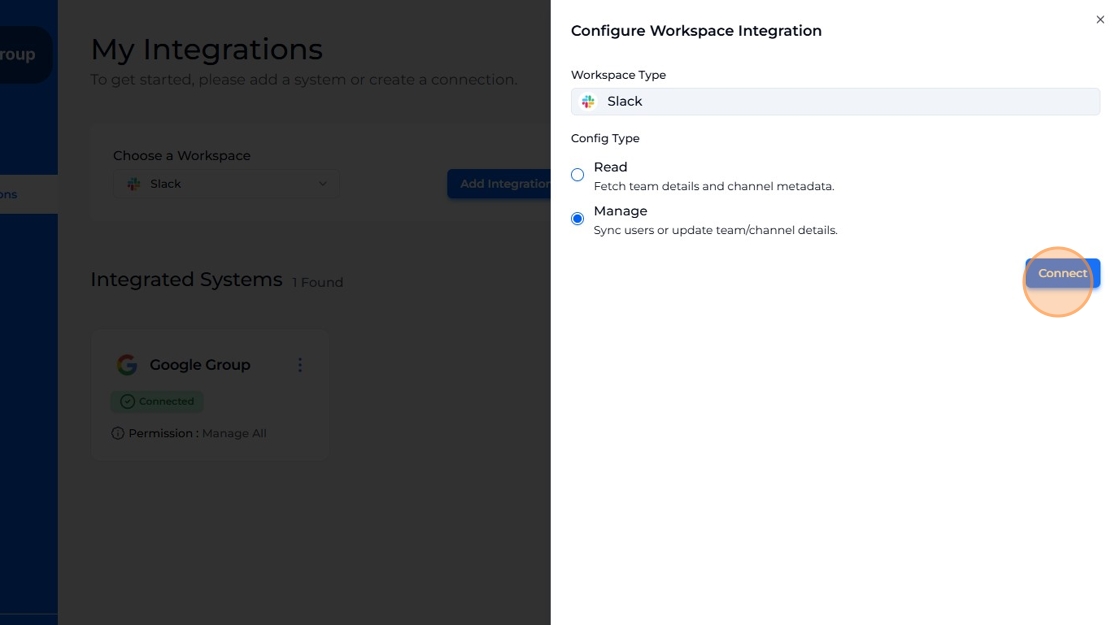
    Select config type and click Connect.

  7. Select the Slack workspace you want to connect with and click "Allow".
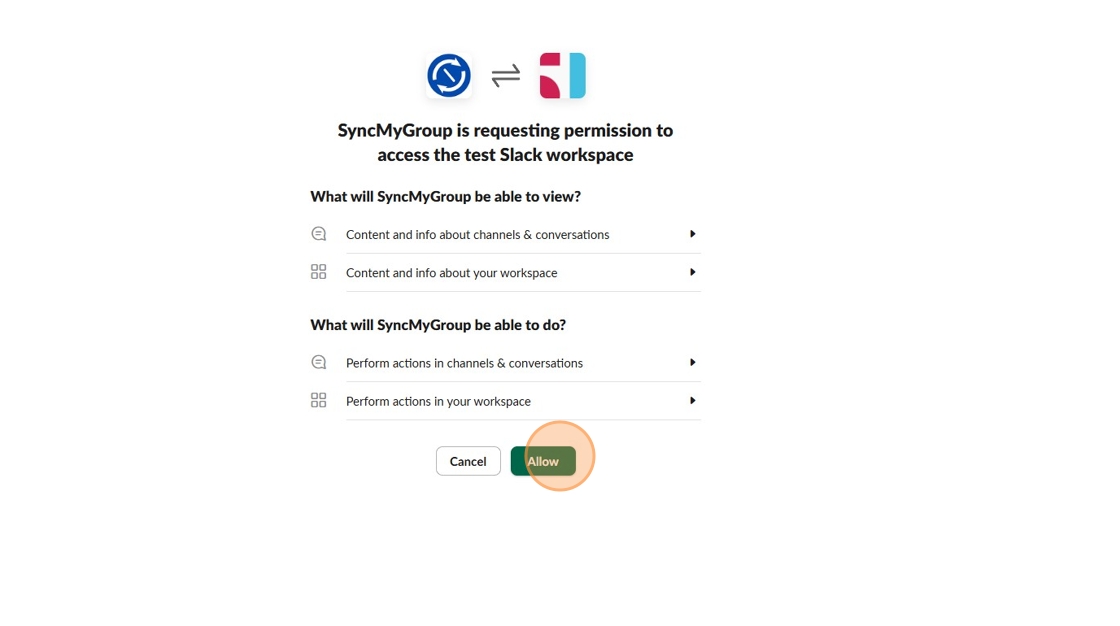
    Select the Slack workspace you want to connect with and click Allow.

  8. "Slack" should be integrated successfully.
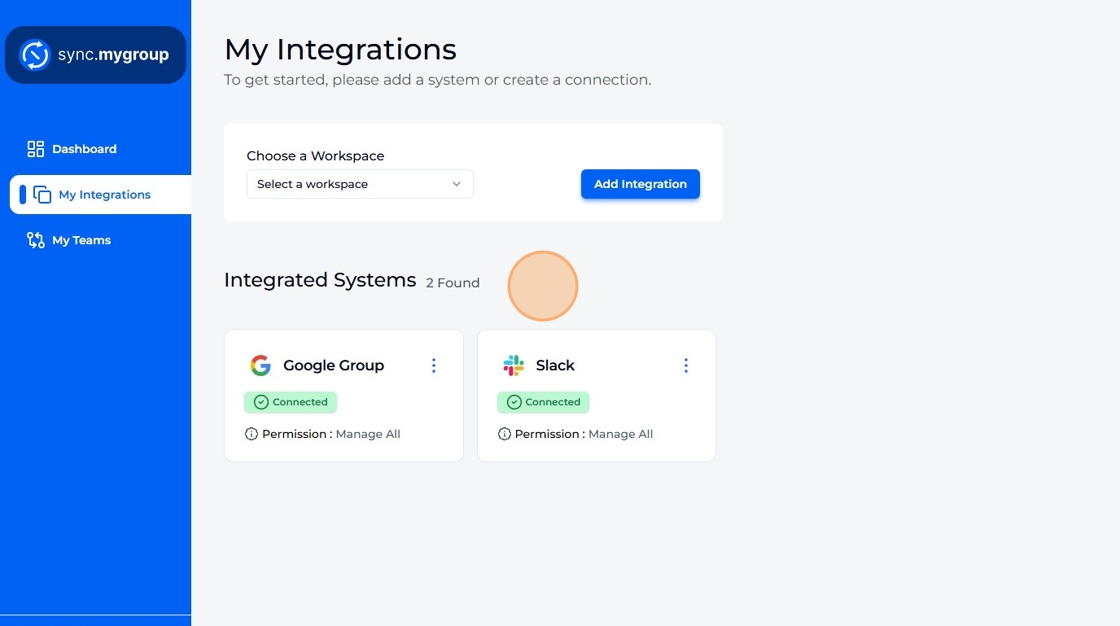
    Slack should be integrated successfully.

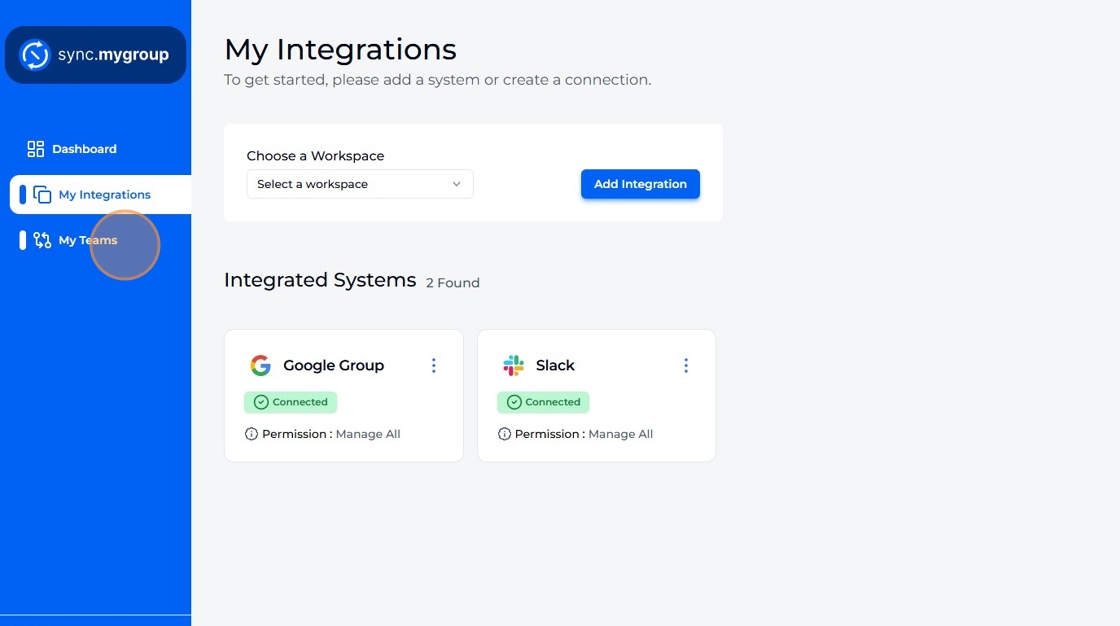
  9. Navigate to "My Teams".

    Navigate to My Teams.

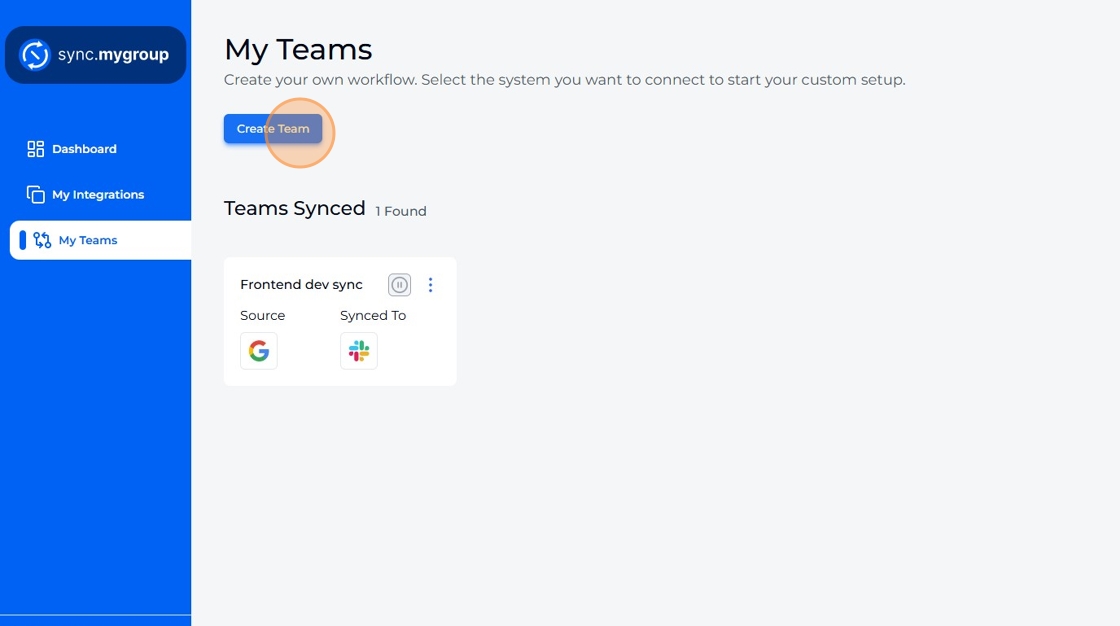
  10. Click "Create Team".

    Click Create Team.

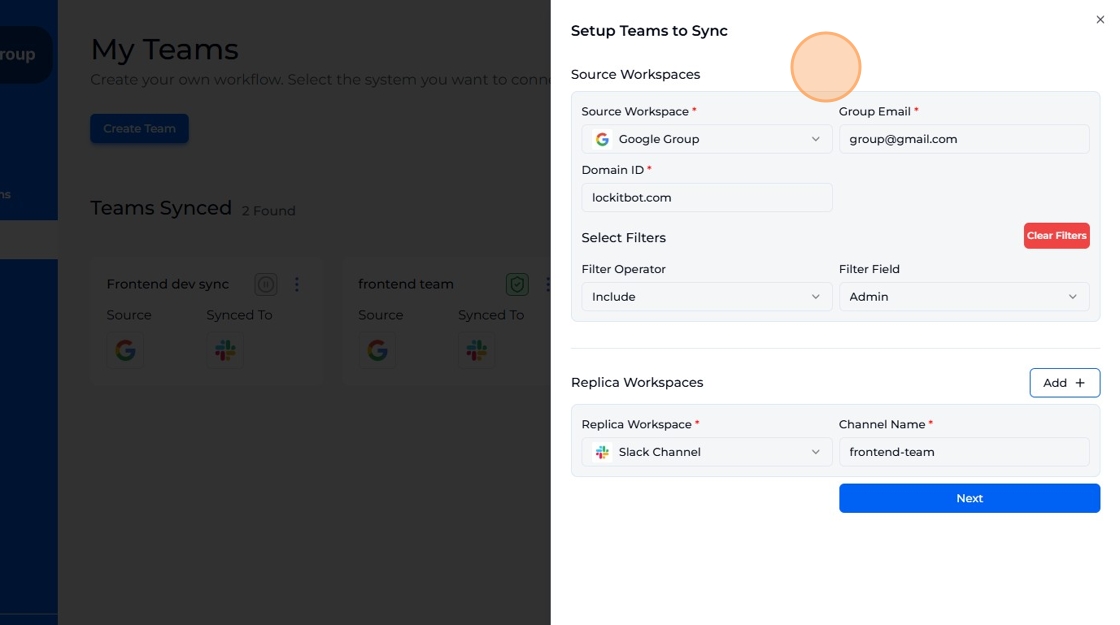
  11. Select "Google Group" as source workspace.
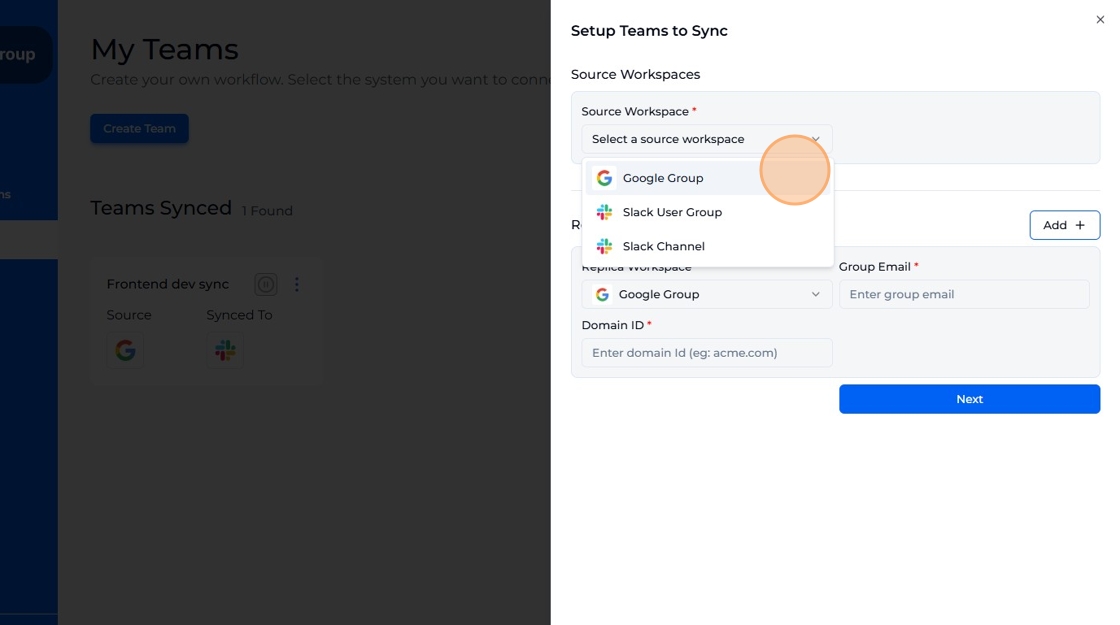
    Select Google Group as source workspace.

  12. Enter "Group Email" id and "Domain" id.
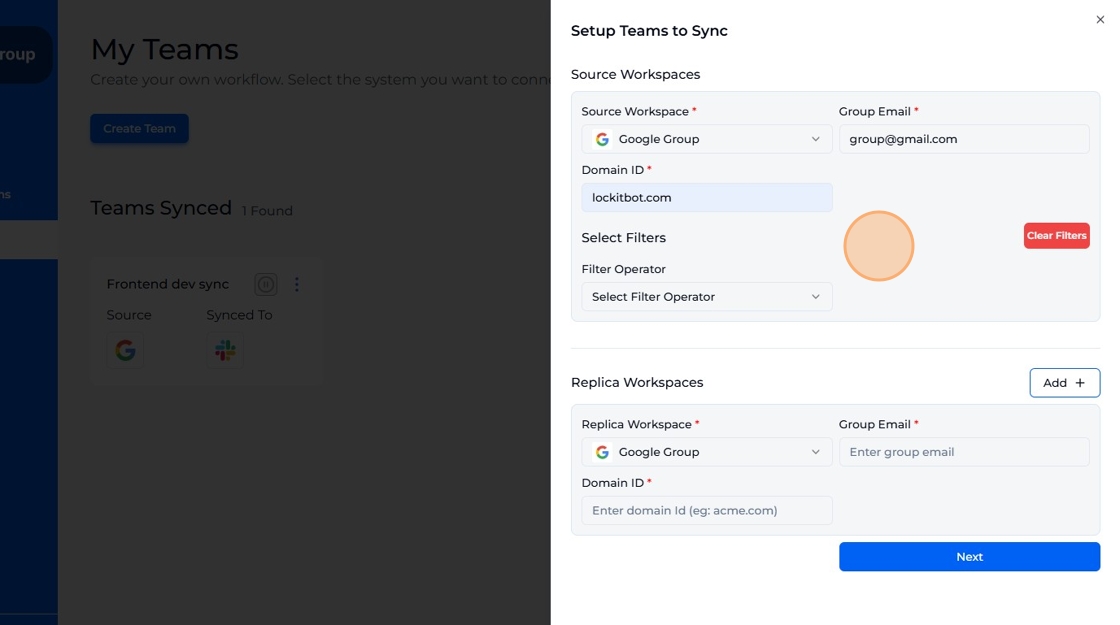
    Enter Group Email id and Domain id.

  13. Select filters as per your requirement.
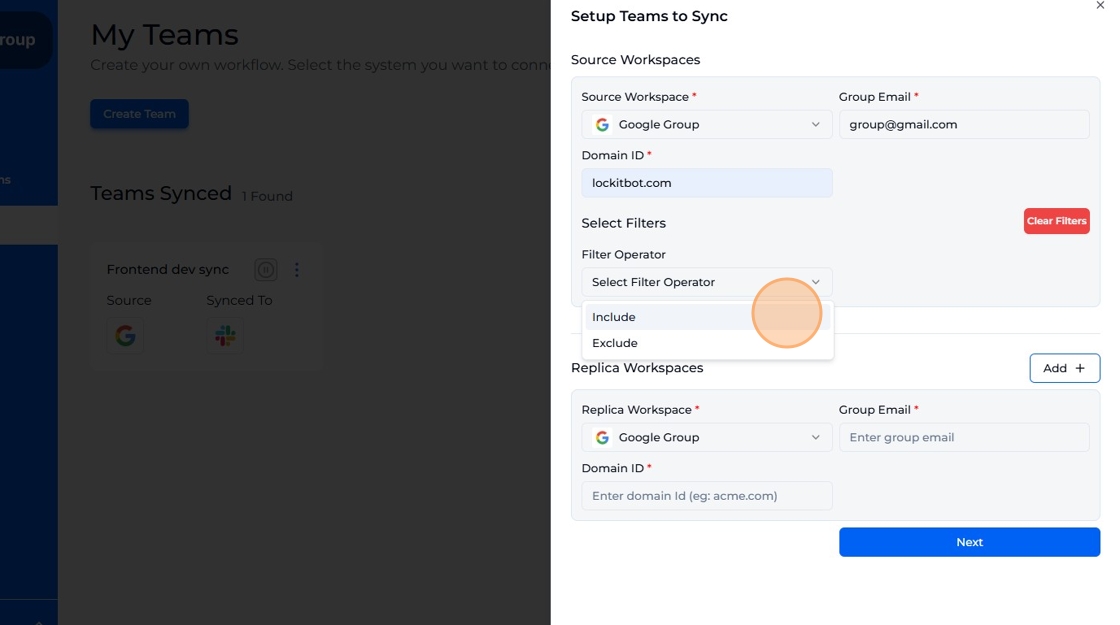
    Select filters as per your requirement.

  14. Example: here we choose to include users that are admin.
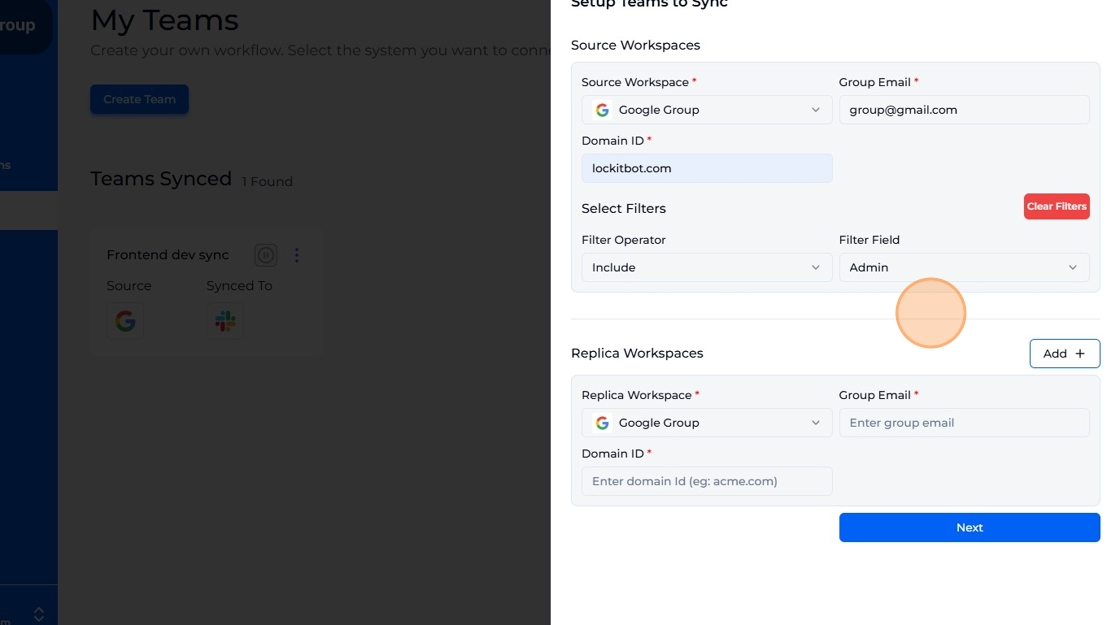
    Example: here we choose to include users that are admin.

  15. Select any "Slack" workspace as a replica.
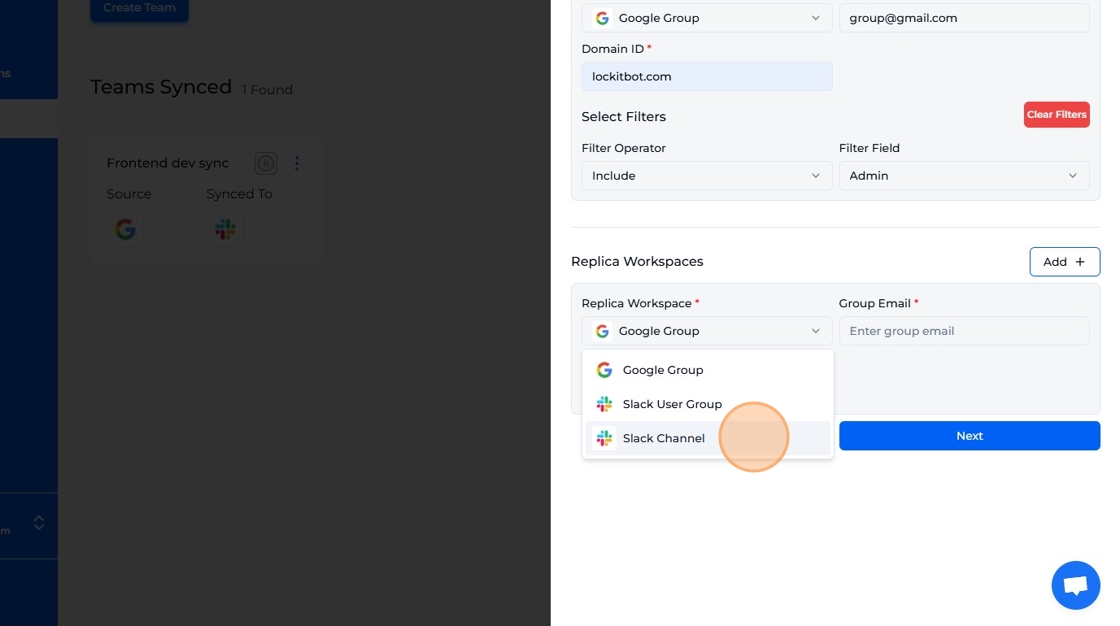
    Select any Slack workspace as a replica.

  16. Enter Slack channel name and click "Next".
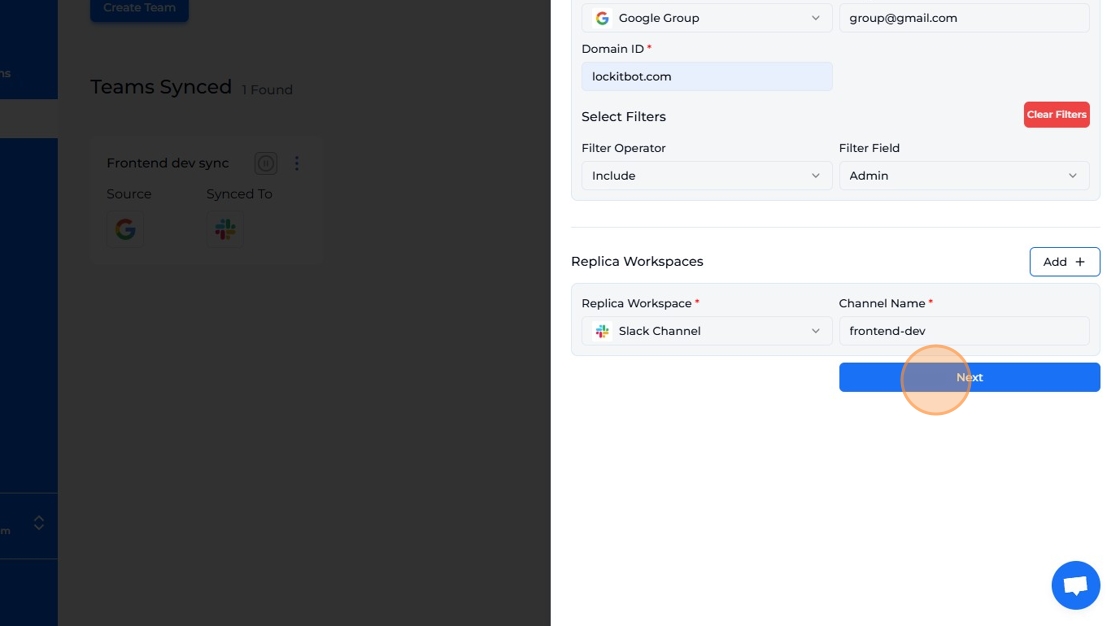
    Enter Slack channel name and click Next.

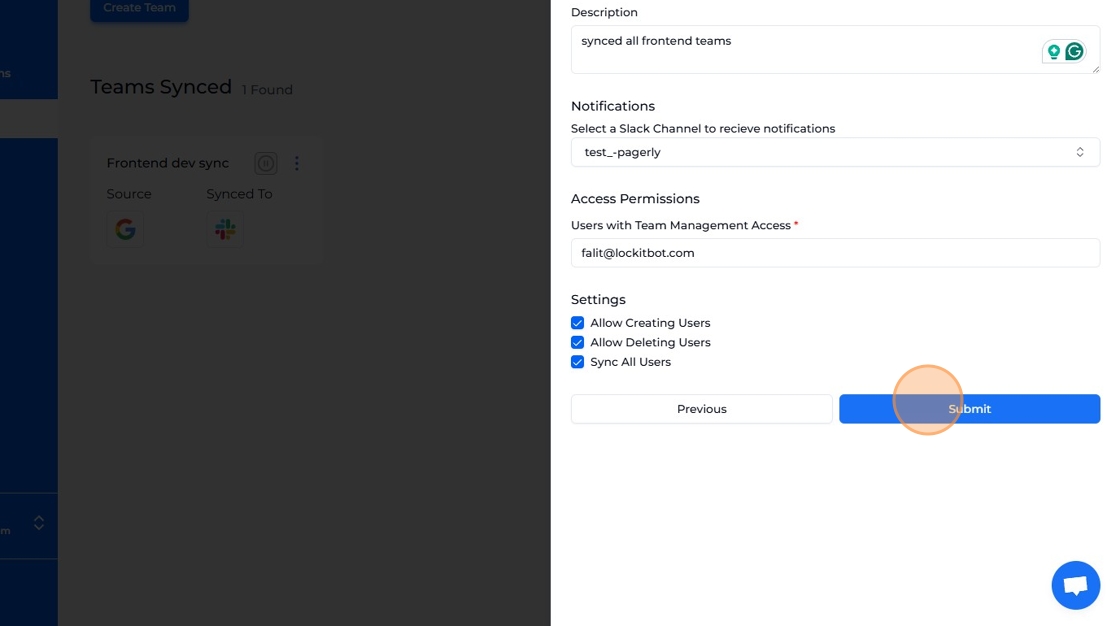
  17. Fill in the form and click "Submit".

    Fill in the form and click Submit.

  18. A new team with "Google Group" as the source and "Slack" as a replica has been successfully created.
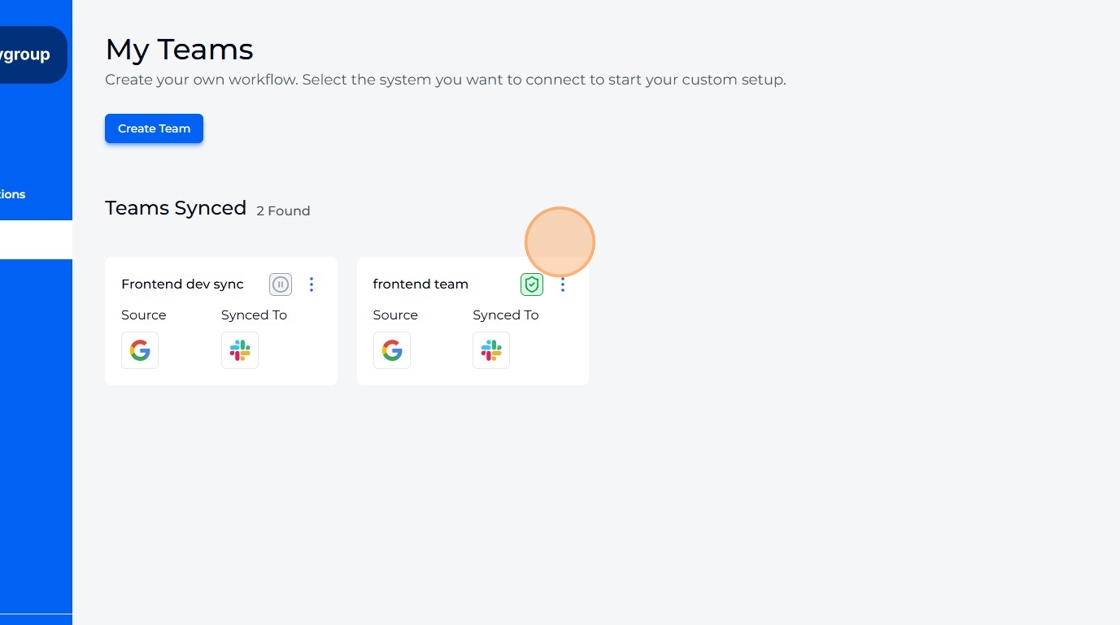
    A new team with Google Group as the source and Slack as a replica has been successfully created.

  19. Click 'Settings' to update team settings, following the steps outlined above.
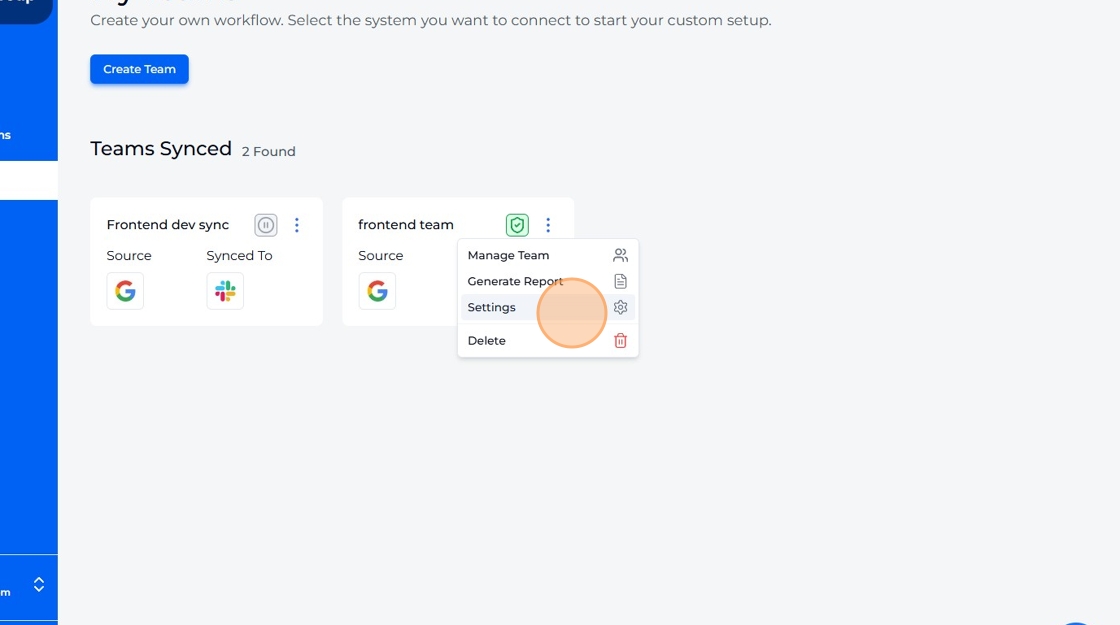
    Click 'Settings' to update team settings, following the steps outlined above.

  20. Change the details if required.

    Change the details if required.

  21. Click "Submit" and team should be updated.
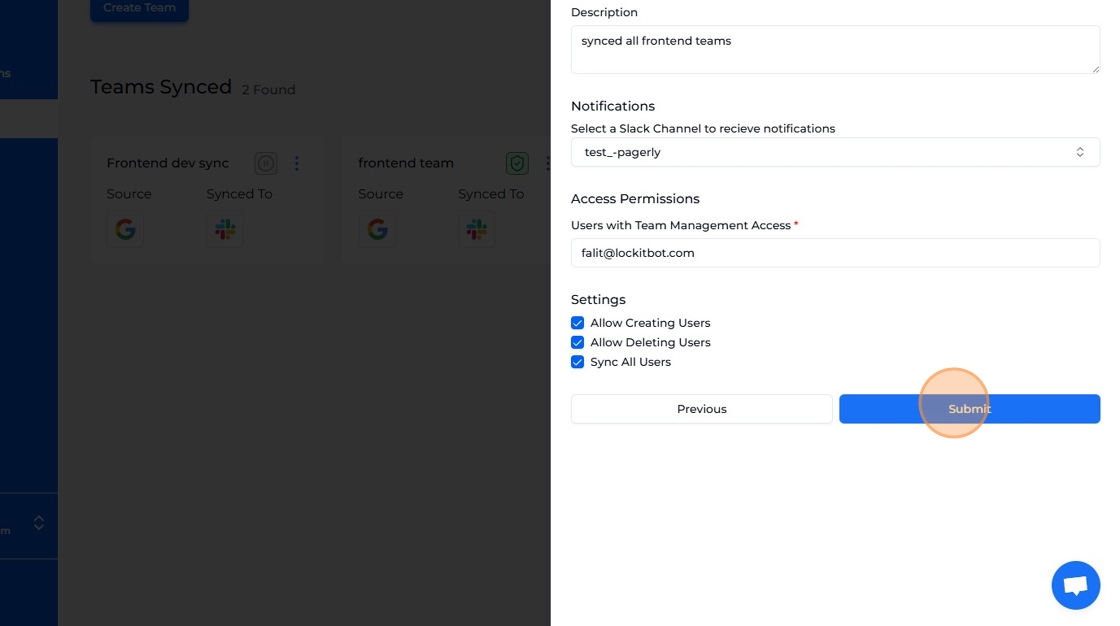
    Click Submit and team should be updated.

  22. Example: changed team name from "frontend team" → "frontend team update".
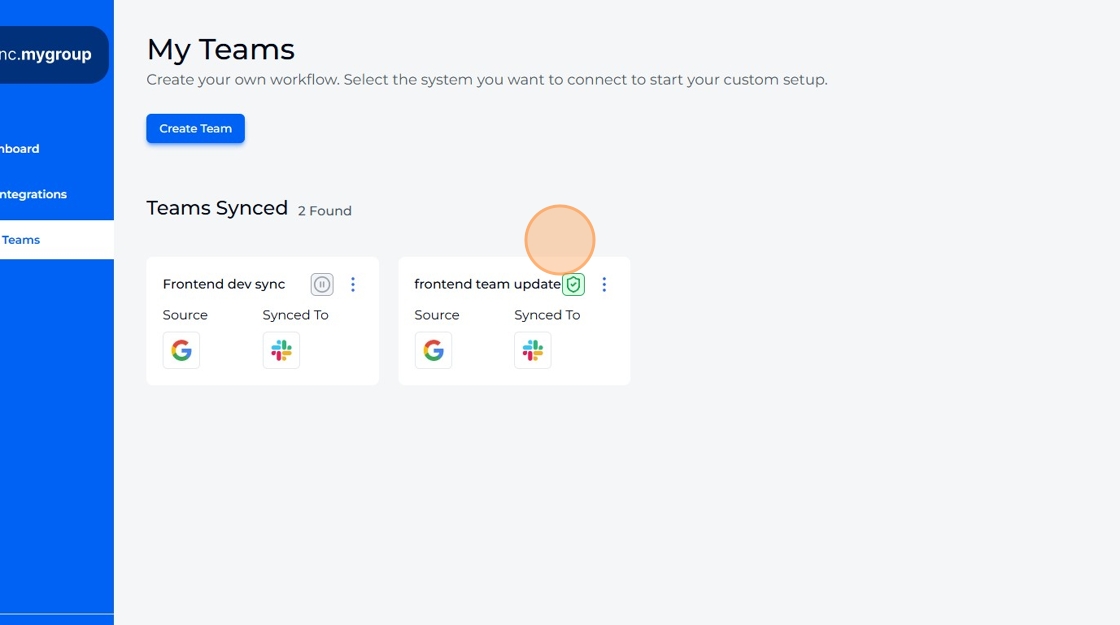
    Example: changed team name from frontend team → frontend team update.

  23. Click "Delete" option if you want to permanently remove team.
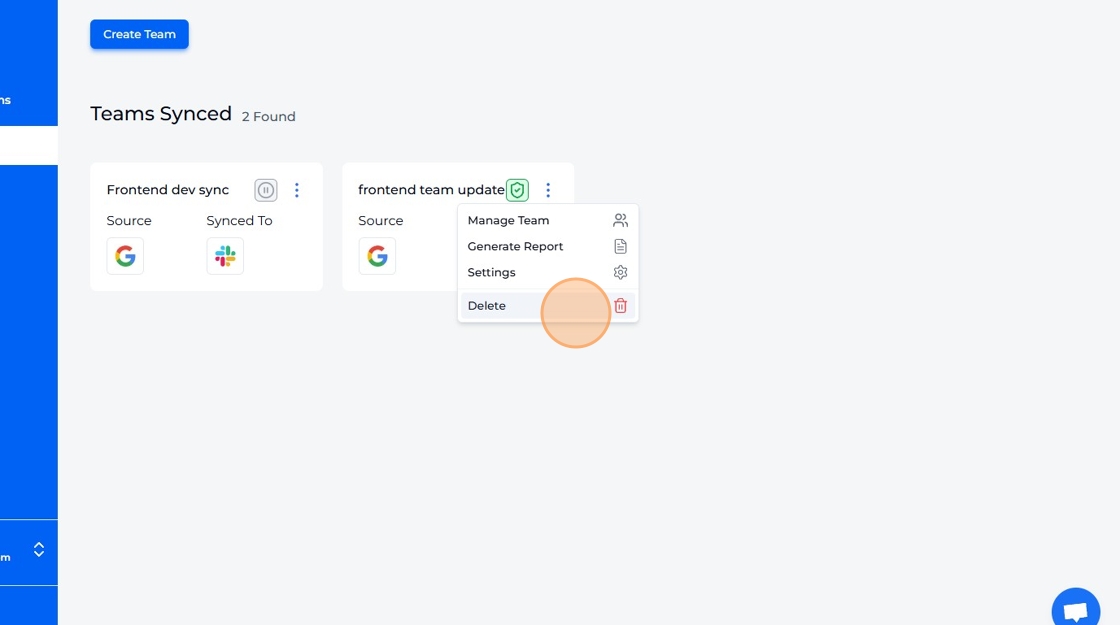
    Click Delete option if you want to permanently remove team.

  24. Confirm to successfully delete a team.
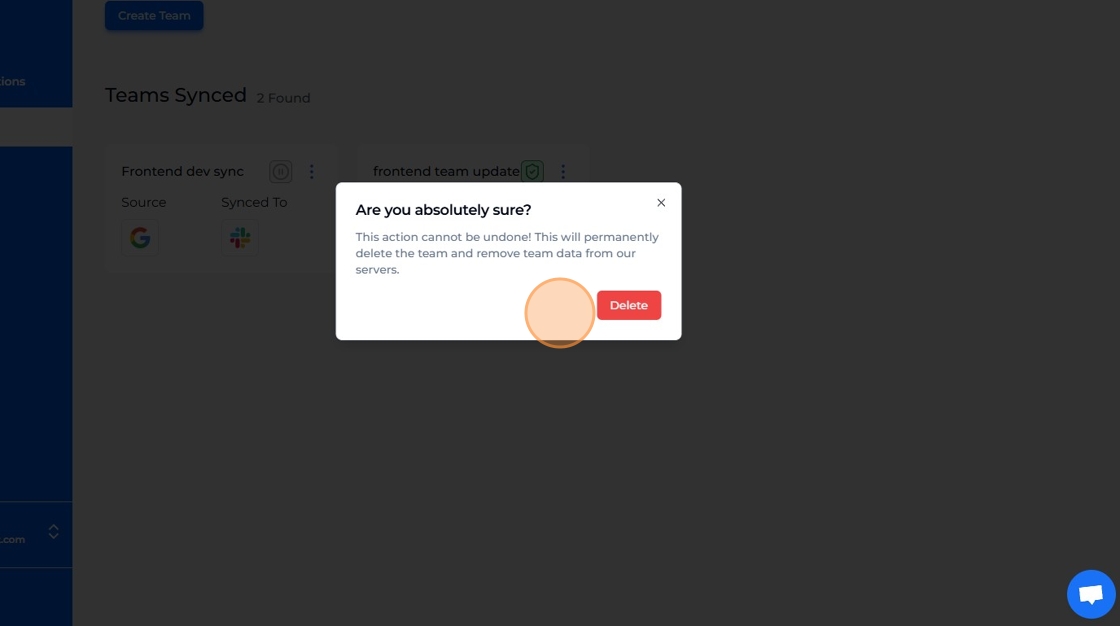
    Confirm to successfully delete a team.

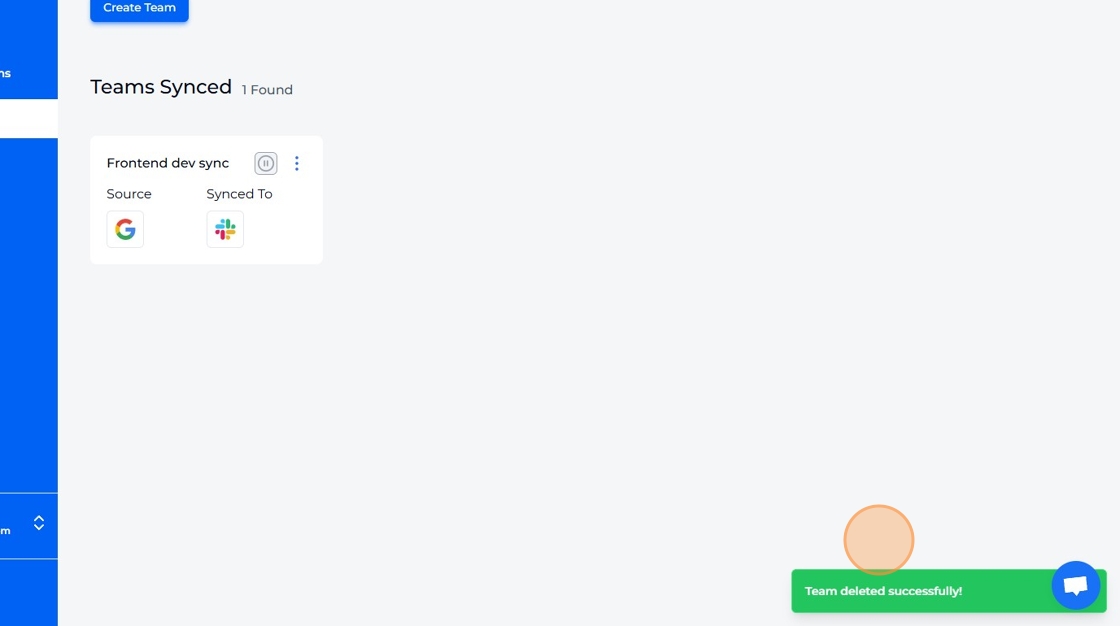
  25. Team has been deleted.

    Team has been deleted.

  26. To generate a report for a team select "Generate Report" option.
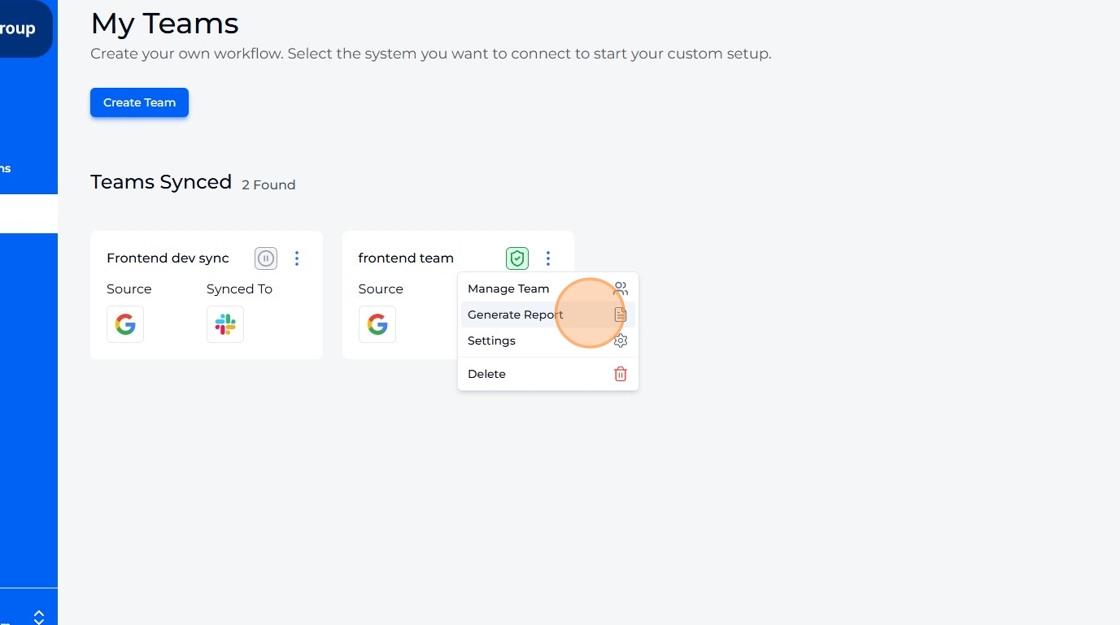
    To generate a report for a team select Generate Report option.

  27. Provide an email address and select a date range. Click "Generate Report".
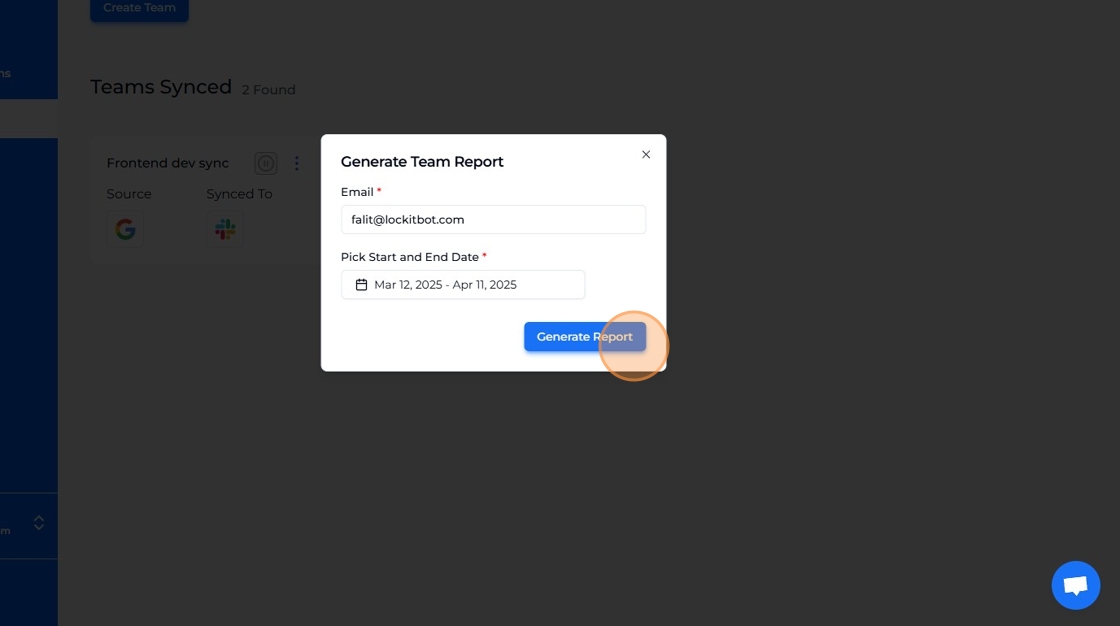
    Provide an email address and select a date range. Click Generate Report.

  28. Success! Report will be generated shortly.
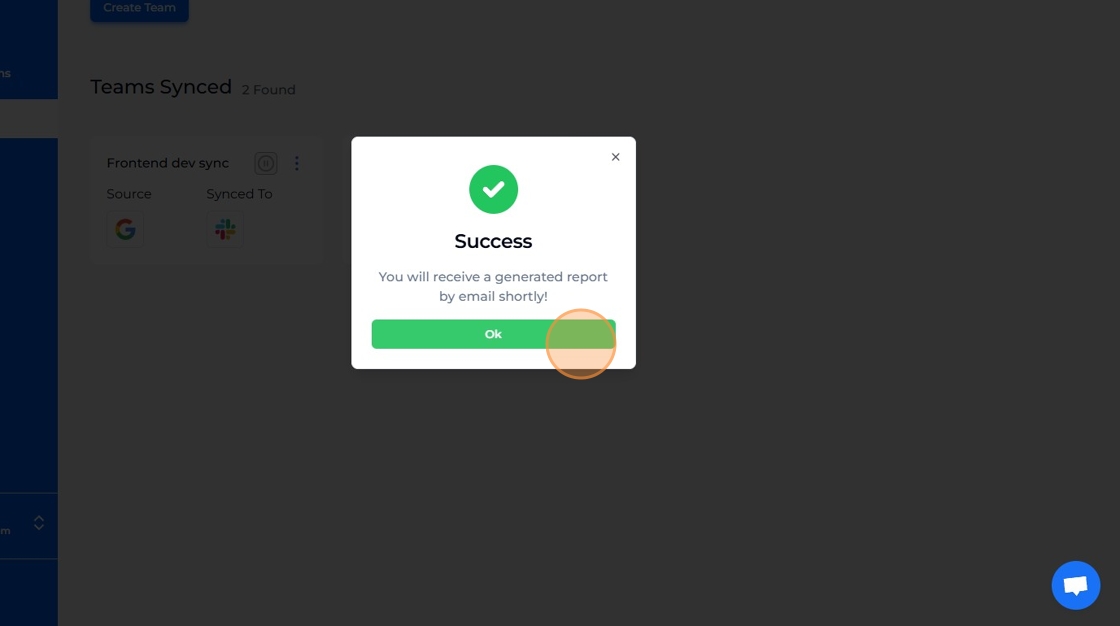
    Success! Report will be generated shortly.

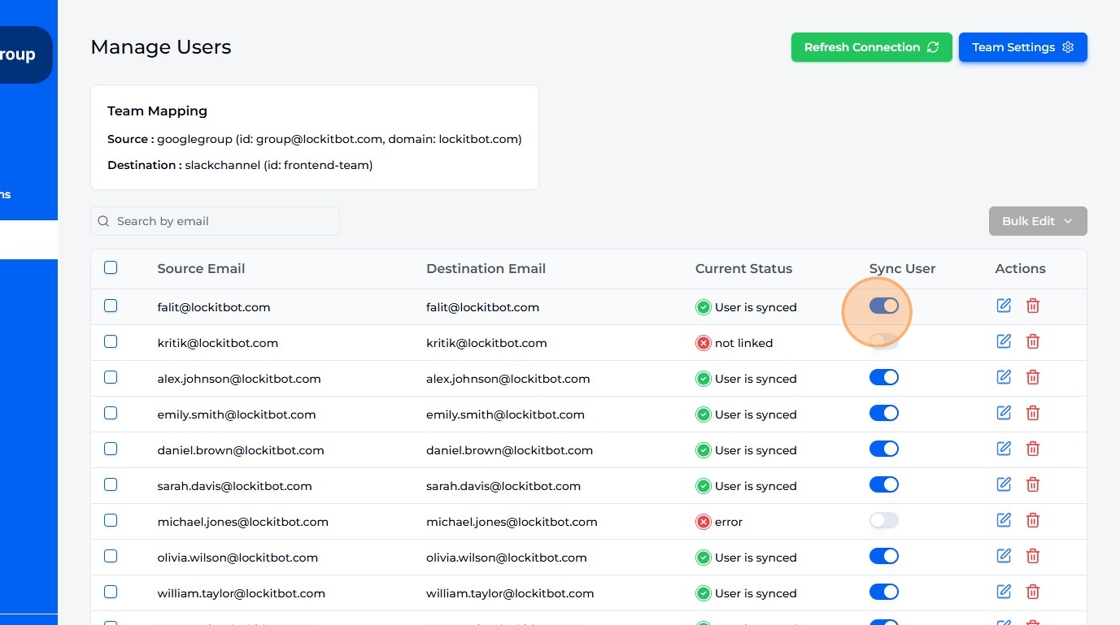
  29. Click "Manage Team" to manage team user details.
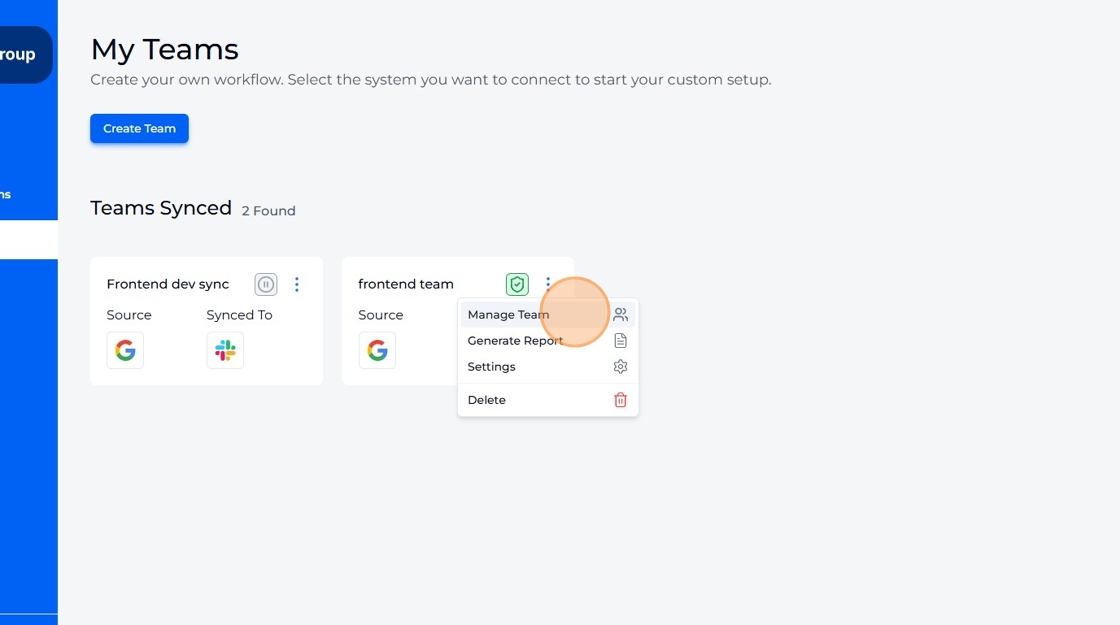
    Click Manage Team to manage team user details.

  30. Update a user's sync status.

    Update a user's sync status.

  31. Update the user's destination email address.
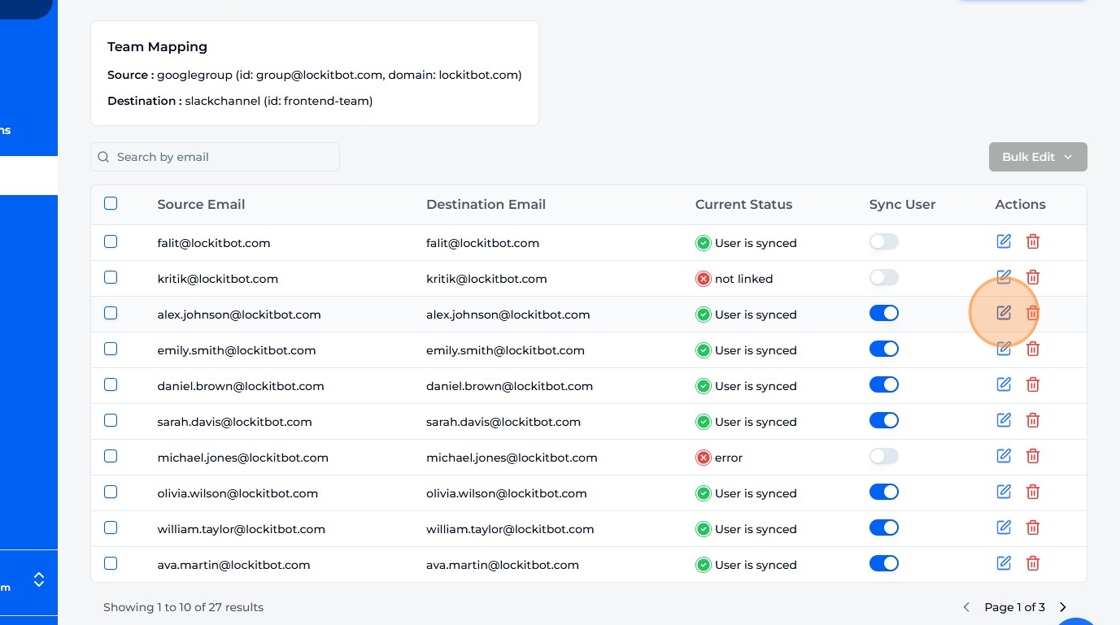
    Update the user's destination email address.

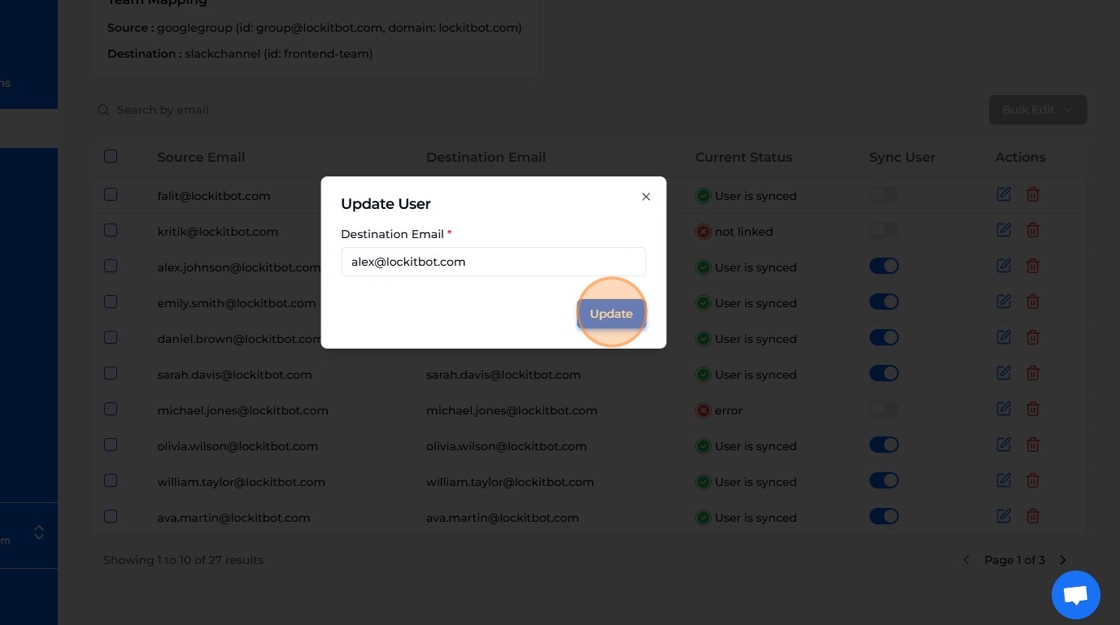
  32. Update the email and submit.

    Update the email and submit.

  33. User's destination email successfully updated from "alex.johnson@lockitbot.com" to "alex@lockitbot.com"
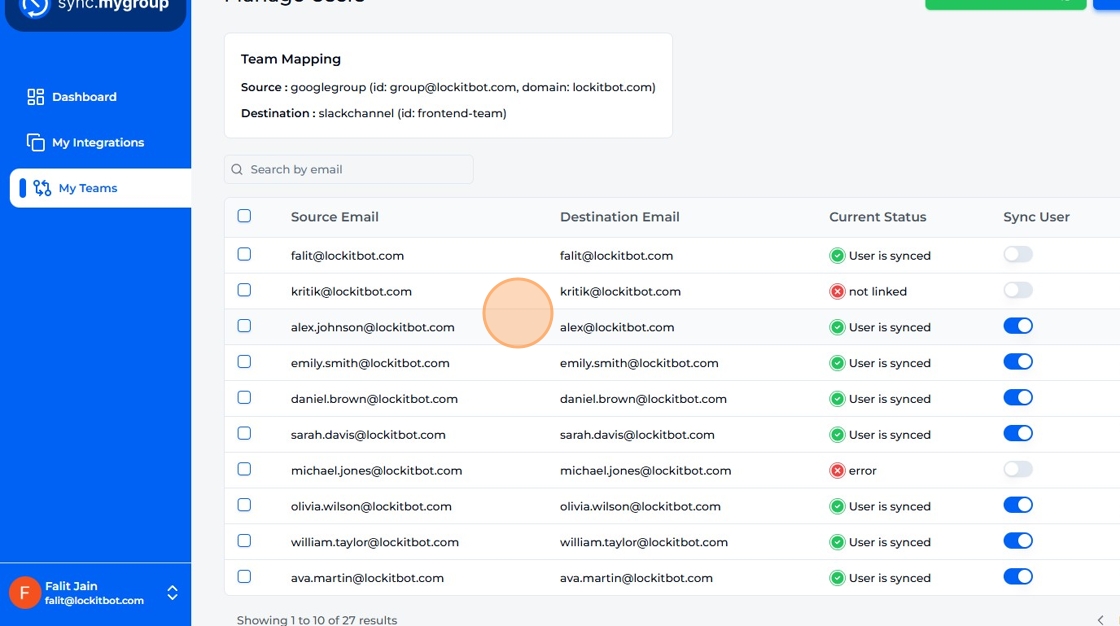
    User's destination email successfully updated from alex.johnson@lockitbot.com to alex@lockitbot.com

  34. Click Delete icon to permanently remove a user from team.
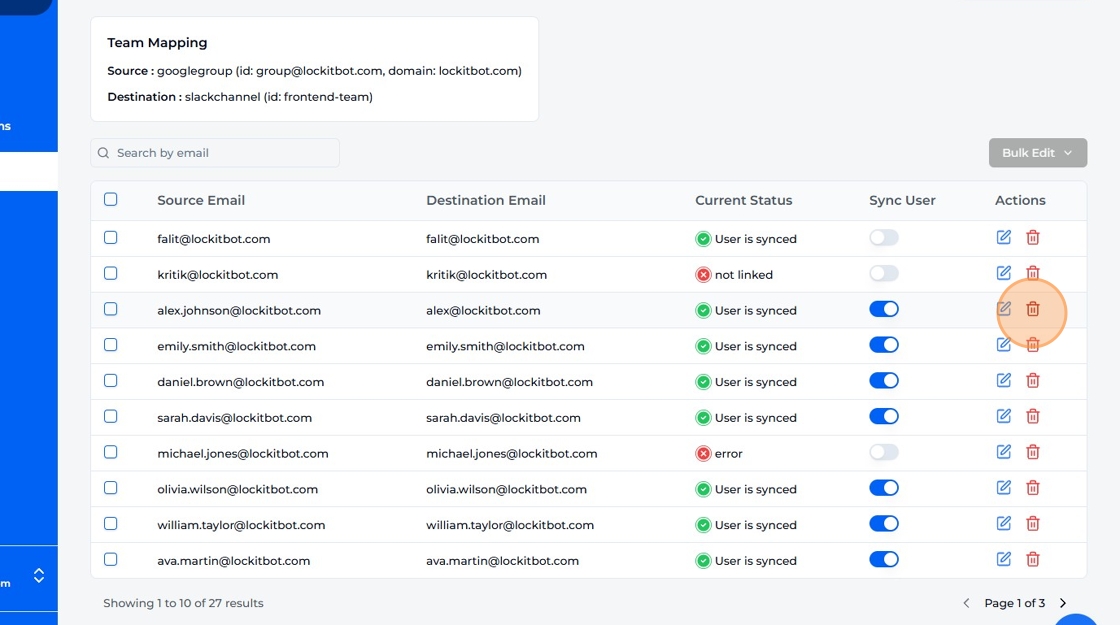
    Click Delete icon to permanently remove a user from team.

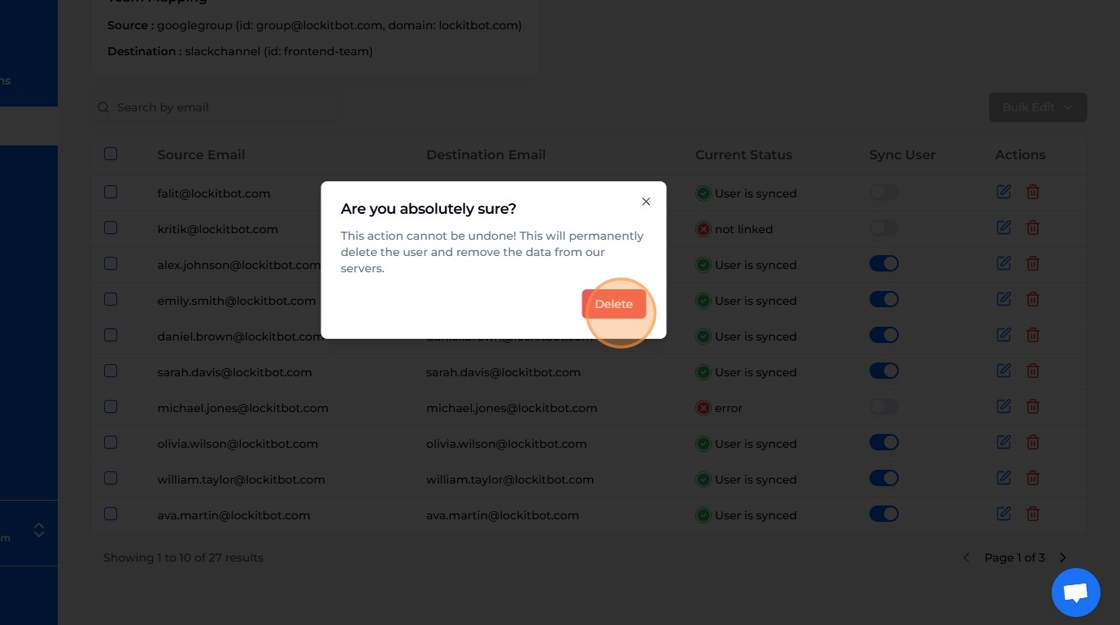
  35. Confirm user deletion.

    Confirm user deletion.

  36. Search for a user based on their email.
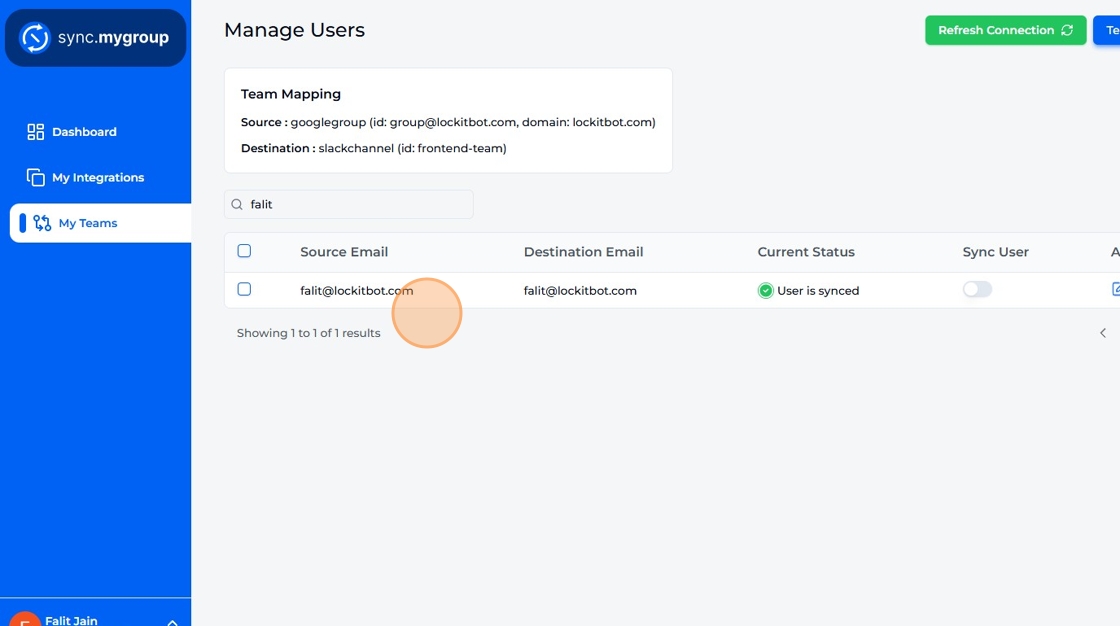
    Search for a user based on their email.

  37. Select multiple users for bulk update.
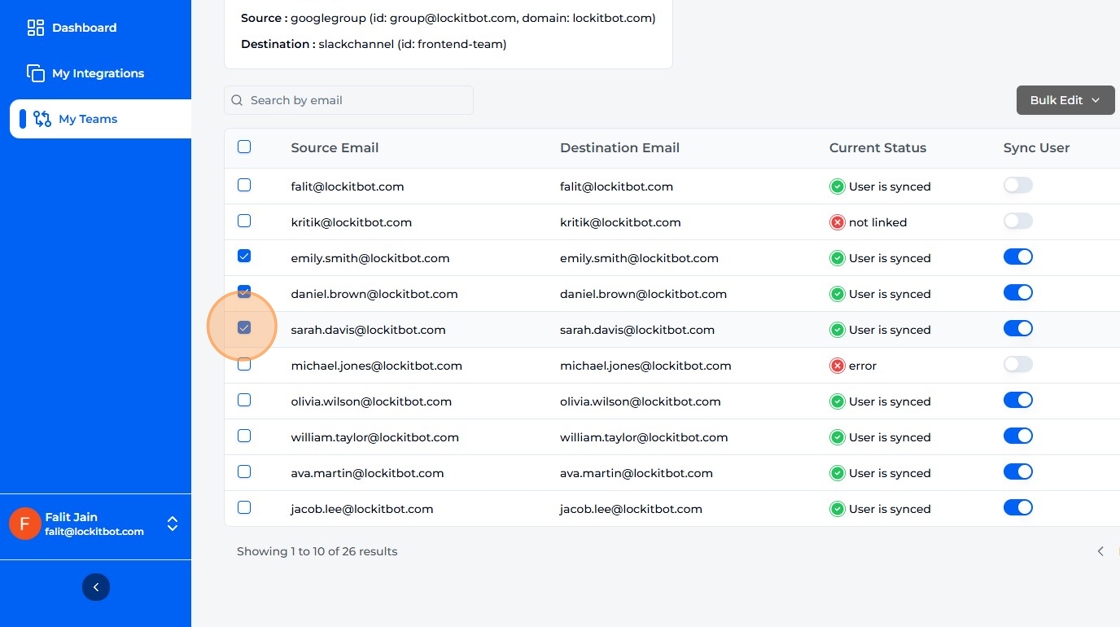
    Select multiple users for bulk update.

  38. Click "Bulk Edit" button and select an option based on your requirement.
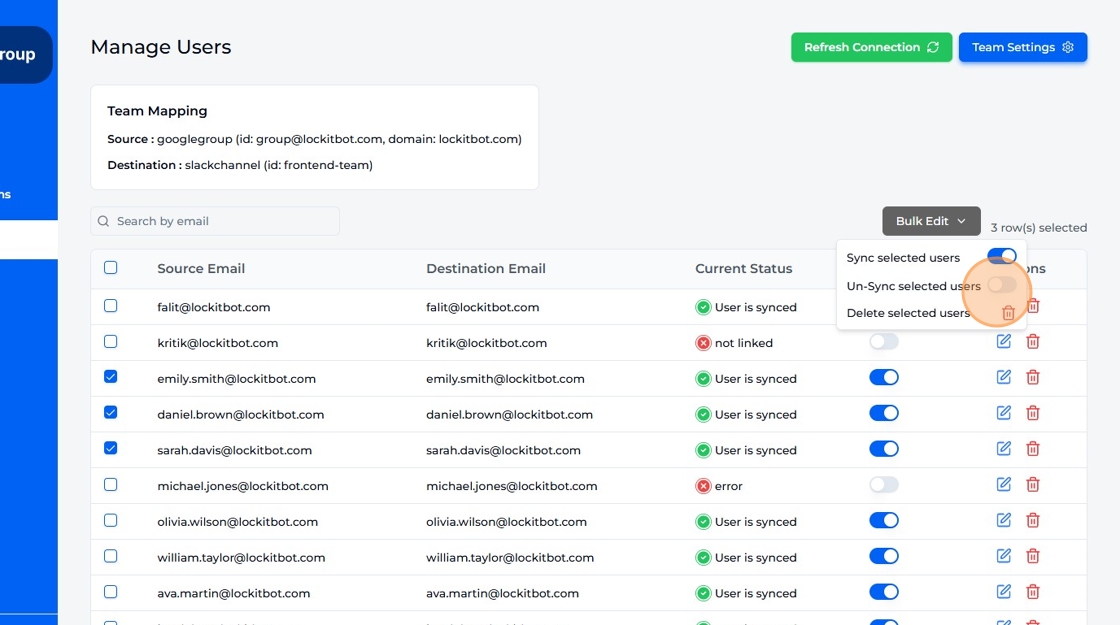
    Click Bulk Edit button and select an option based on your requirement.

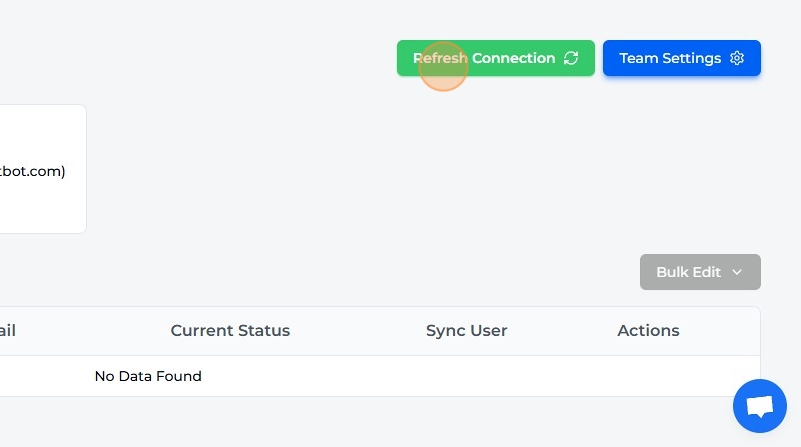
  39. Click "Refresh Connection".

    Click Refresh Connection.